Run the site
Getting a site
running.
Locations, chargers, identities, tariffs, access and credentials. The whole setup surface, and the two or three places where a small mistake is expensive.
Locations
A location is a physical site: an address, coordinates, a type and an electricity rate. Everything reports against it, so it is worth getting right before you add hardware.
The address is geocoded and normalised. Do not free-type the province or the country, because consistent geography is what makes the map, the reporting and, in Canada, the carbon registration work.
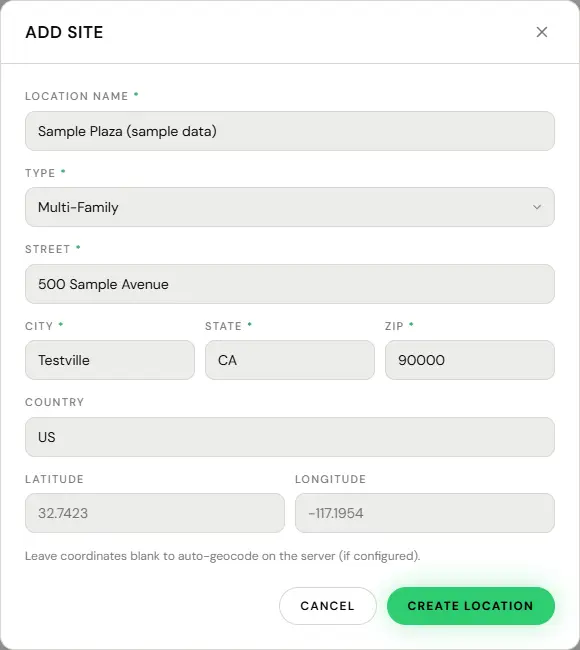
- Stations, Sites, then Add Site.
- Name, site type and street address. Save.
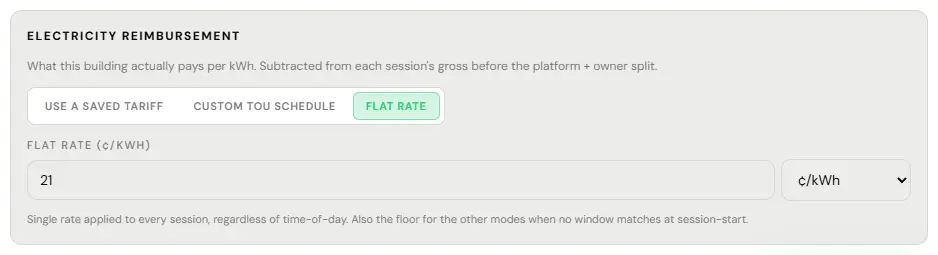
- Open the location and set the electricity rate on its Electricity Reimbursement card.
Every margin figure you see is calculated against it. Leave it at zero and the platform will cheerfully report gross revenue as if power were free, which is a number that looks right and is not. When a figure looks right, ask what produced it.
Where the site is reimbursed for its electricity, the same rate is what we reimburse at, applied to each session at the rate in effect when it starts. A change applies only to sessions that start after you save it, so keep it current. The rules are in our Site Host Terms.
Getting it online
A charger is not much use until it can reach us. This is the decision to make before the unit goes on the wall, not after, because one of the three answers needs a cable pulled and the other two do not.
- Ethernet. A cable from the unit back to a router. The most reliable of the three and the one that needs planning: the run has to exist before the installer leaves. On Autel Ultra hardware only the charger nearest the router needs the cable, and the rest of the row chains off it.
- Cellular. A SIM in the unit. It brings its own connection, so it works at a site with no network of its own: a lot, an open-air deck, a pad with no building attached. Below grade or inside an enclosed structure, check the signal at the exact spot the unit goes before you commit to it; Autel’s own installation manuals say a repeater is often needed there. Carrier support is per model: Autel’s AC wallbox manual lists Verizon, T-Mobile and AT&T, other models differ, so check the manual for your unit.
- Wifi. Site wifi, joined during the unit’s own setup. Nothing to install mechanically or electrically, which is why it gets picked, and the one that quietly fails six months later when somebody changes the password or moves the router.
You need one of the three, not all three. If the unit is on ethernet or cellular, the wifi step in the unit’s own setup can be skipped entirely.
A session already running keeps delivering power. A car plugged in at the moment the link goes does not stop charging. What stops is everything that needs us: a driver starting a new session from the app, a remote reset, live status, and the meter readings that land in your reports. A card or fob may still start a session offline if the unit holds its own list of allowed cards, and that session reaches your reports when the charger reconnects. If the charger is back within about an hour of its last reading, its own stop record carries the full meter reading and the session bills normally. If it stays dark longer than that, we close the session on the last reading we received and bill only that. That is the real cost of an unreliable connection, and it is why we would rather see a cable or a SIM than somebody else’s wifi.
- Is there a network drop within reach of where the charger goes? If yes, pull ethernet while the walls are open.
- No drop, or the run is expensive? Use cellular, check the signal at the exact spot the unit goes, and do not let the installer leave until the unit shows on the console. A SIM that was never activated is the usual reason it does not.
- Wifi only if neither is available, and write the network and password down where the next person will find them.
Whichever you pick, confirm the unit actually appears on the console before the installer drives away. A charger that never connected is almost always a SIM that was never activated or an identity that was typed instead of copied, and both are far easier to sort out while the installer is still on site than after they have left.
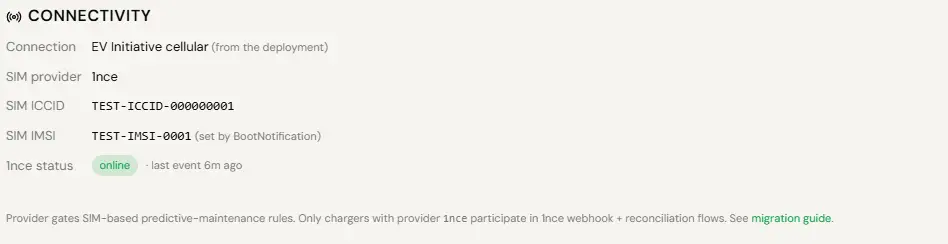
Once a charger has connected, we watch for silence: whether its messages are still arriving, not whether a stored flag says it is online. See preventative maintenance for what that means, and the notices for what arrives in your inbox.
Chargers and identity
A charger is one unit. Its identity is what it announces to the network, and that identity is the single most important field in the whole system.
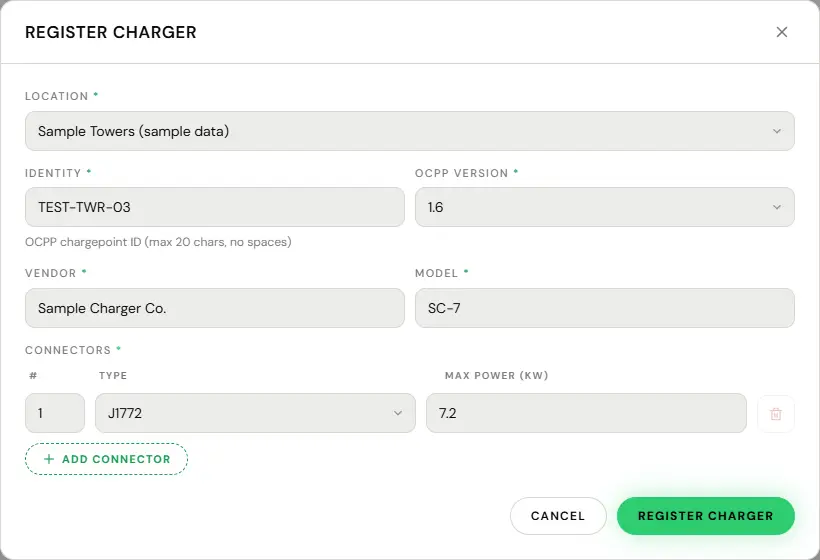
- Open the location, add a charger.
- Paste the identity, copied from the unit’s configuration screen.
- Set connector types and power rating.
- After saving, set who can charge in the charger’s Edit form. See Who may charge.
- Check the identity you entered against the unit’s own configuration, character for character.
- Check the unit has power and a working internet connection.
- Check the websocket address programmed into the unit points at our network.
An identity mismatch produces silence, not an error. If it has never connected and the address is right, the identity is the answer roughly every time.
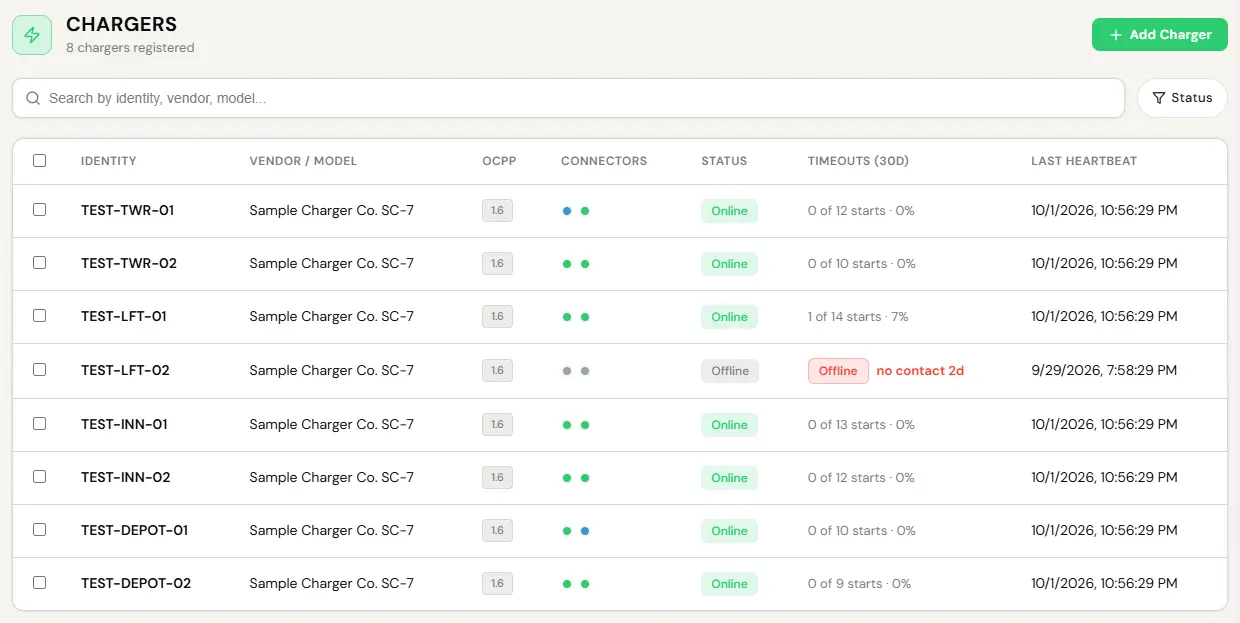
A charger that has connected once and then gone quiet is a different problem, and it is in the fault playbook.
What drivers pay
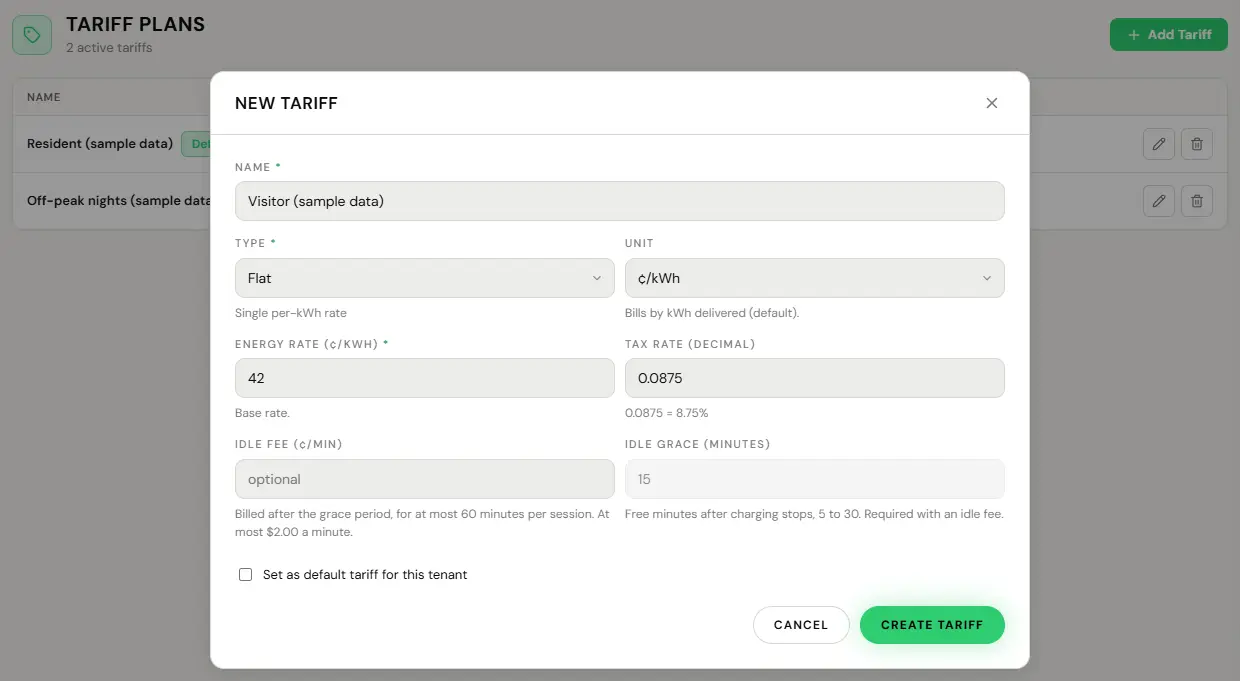
A tariff lives under Manage, Tariffs, and each charger picks one. Three types, each billed per kWh or per hour.
- Flat. One rate. Per kWh is the normal choice, and the driver sees the rate before they plug in. Per hour suits a site selling the parking space more than the power.
- Time of use. Different rates by hour and day, which is how you stop everyone arriving at 6pm.
- Tiered. The rate changes at usage thresholds.
- Free. A rate of 0. A real setting, and everything else still works.
Any of them can carry an idle fee for a car left plugged in after charging. There is no session fee for you to set: EV Initiative’s connection fee is set per charger by EV Initiative and shown to the driver before they start.
- Edit the tariff under Manage, Tariffs, or create a new one with Add Tariff.
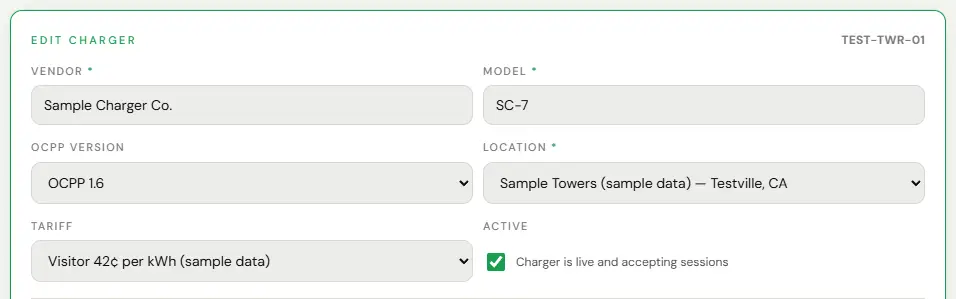
- To move a charger to a different tariff, open the charger, use Edit, and pick it under Tariff.
- Save. It is live immediately.
A price change takes effect on sessions that start after it. It never reprices a session already running.
Who may charge
Set per charger, in its Edit form and on its Overview tab, and changeable any time. Drivers on your own account charge at your rate, and residents join your account with the building join code. These settings decide who else can.
- Open to guests. Outside drivers can charge too, paying your rate plus the guest markup you set on the charger. Off, and only drivers on your account can use it.
- Public network listing. On, and the charger is on the driver map. Off, and it stays reachable by a direct link or a QR code.
- Guest pass list. Named drivers who can charge whatever the Open to guests switch or the guest hours say. They still pay.
- Guest hours. Time windows for when outside drivers may charge.
- Fleet Assignment. On the Overview tab. Assigning a fleet makes the charger fleet only, or mixed use if you let the public charge as well, and fleet sessions bill that fleet.
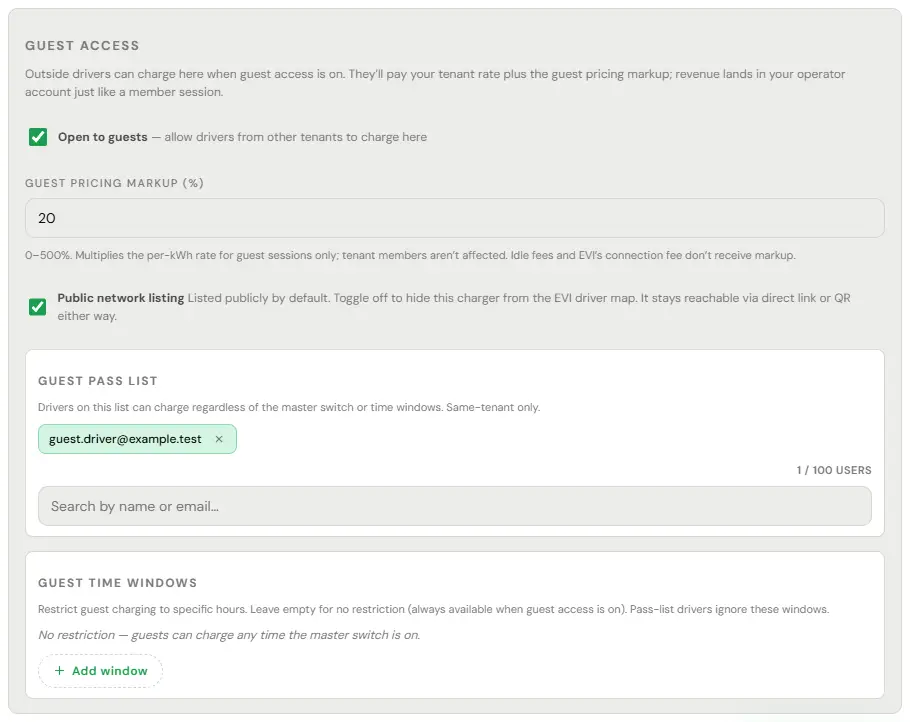

- Open the charger, use Edit, and turn Open to guests off.
- Turn Public network listing off too if it should not be on the map.
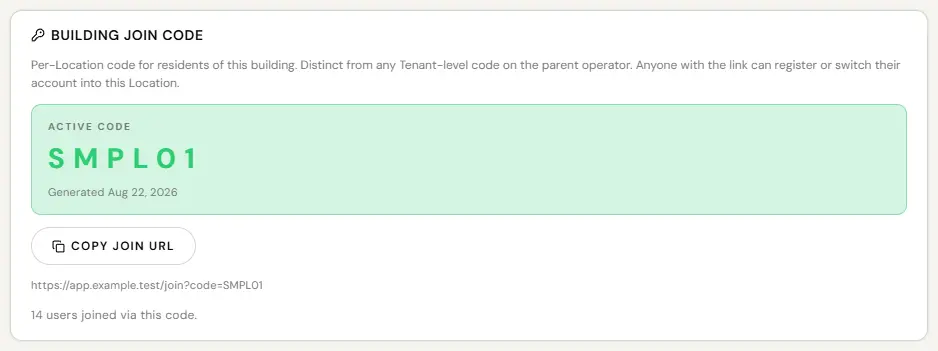
- Give residents the building join code. Once they join they are drivers on your account, so they charge at your rate and outside drivers cannot start a session.
Every building has a join code. Post it where residents already look: the notice board, the resident app, the new-tenant pack, the lift. A resident enters it once and they are linked to your building. You do not have to add people one at a time.
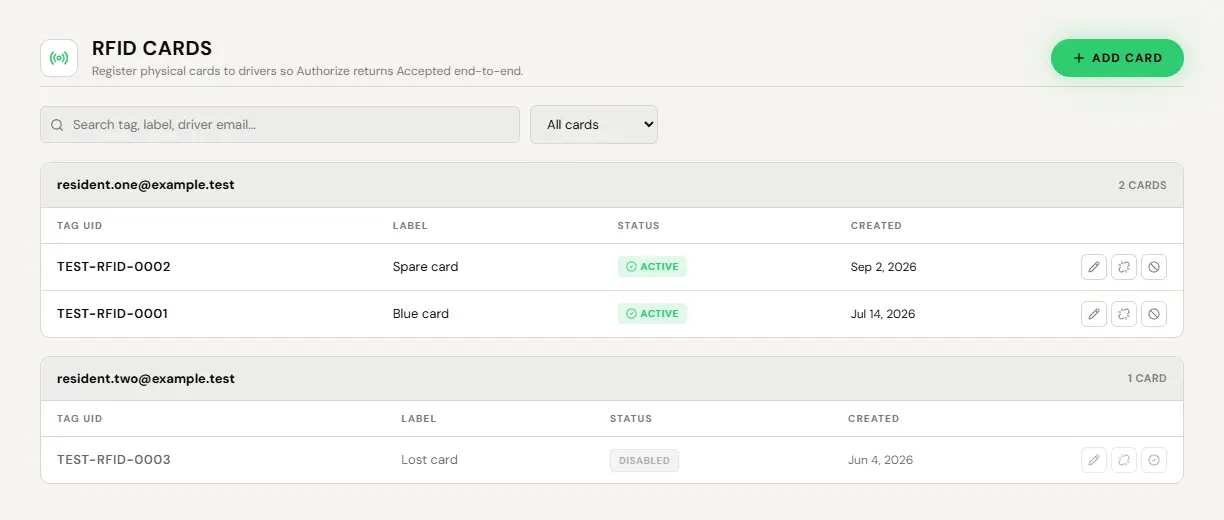
RFID cards and fobs
For people who will not use a phone, and for fleet drivers.
- $50 for a new consumer card, paid by the driver.
- $25 to register a fob the driver already owns. They tap it at one of your chargers and it is theirs.
- $15 per fleet keyfob, paid by the operator rather than the driver.
- Manage, RFID, Card Management.
- Add a card and assign it to a driver, or release or disable one.
A lost fob is killed in seconds. It does not have to be a security problem for a week.