
Start
Your first
week.
From the invite in your inbox to the first session that pays you. Do these in order and you will not have to undo anything.
Day one: the account
You will have an invite by email. It is single-use and it lasts fourteen days.
- Open the invite link and set your password.
- Turn on two-factor authentication when prompted. The admin console will not let you past sign-in without it, and that is deliberate.
- Check the name on the account is the one you want on payout records.
Two-factor covers the admin side only. Your driver account, if you have one, is separate and unaffected.
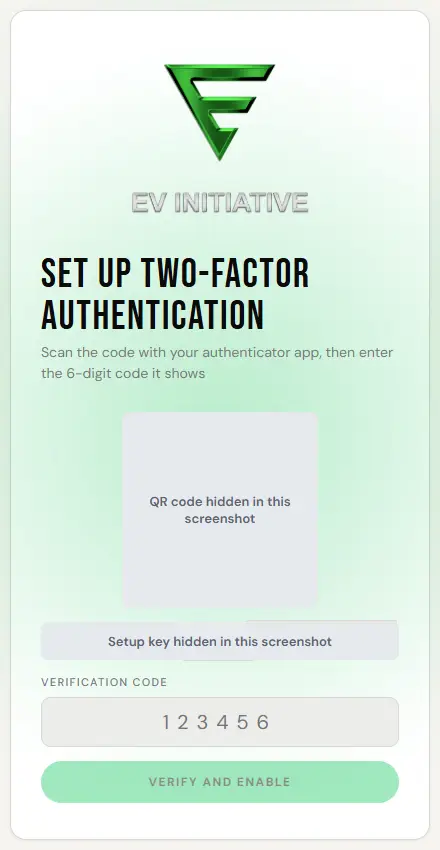
If you also charge a car, you are a driver and an admin on the same email. Admin power is a grant layered on your driver account, and it only wakes on the admin console behind two-factor. Removing the admin grant later leaves your driver account and your charging history completely untouched. That is two separate levers on purpose.
Day two: the site
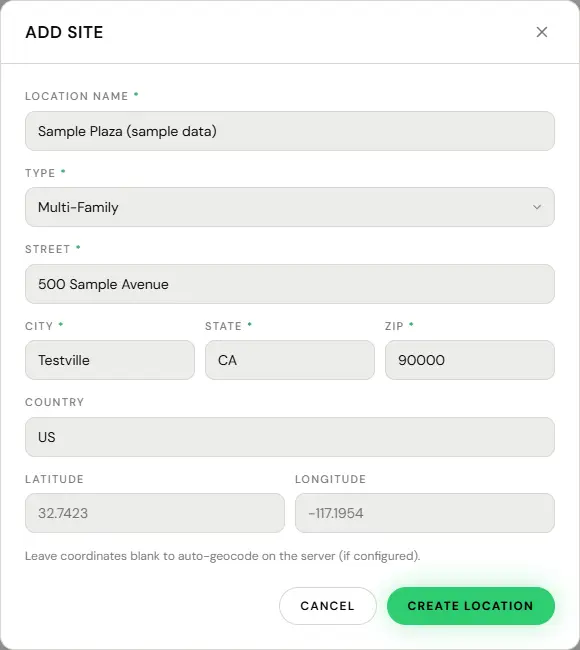
A location is a physical place with an address and an electricity rate. Chargers hang off it. Get the location right first, because the address is geocoded and everything downstream reports against it.
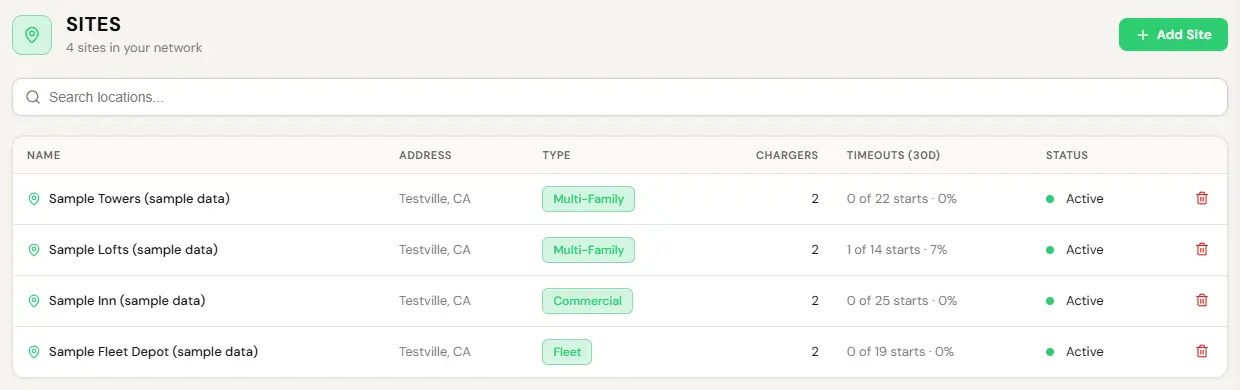
- Go to Stations, Sites and use Add Site.
- Enter the street address. It is geocoded and normalised, so do not hand-type the state or the country.
- Set the site type and save.
- Open the location and set your electricity rate on its Electricity Reimbursement card. The rate is what makes your margin figures real rather than gross. If the site is reimbursed for its electricity, it is also the rate we reimburse at.
- Open the location and add a charger.
- Copy the identity from the unit’s own configuration screen. Do not read it off a label and type it.
- Set the connector types and the power rating.
- Save. When the electrician points the unit at the network, it announces itself and connects on its own.
There is no provisioning step and no ticket. The charger announces itself when it connects, and commissioning finishes on site after a tested plug-in and launch approval.
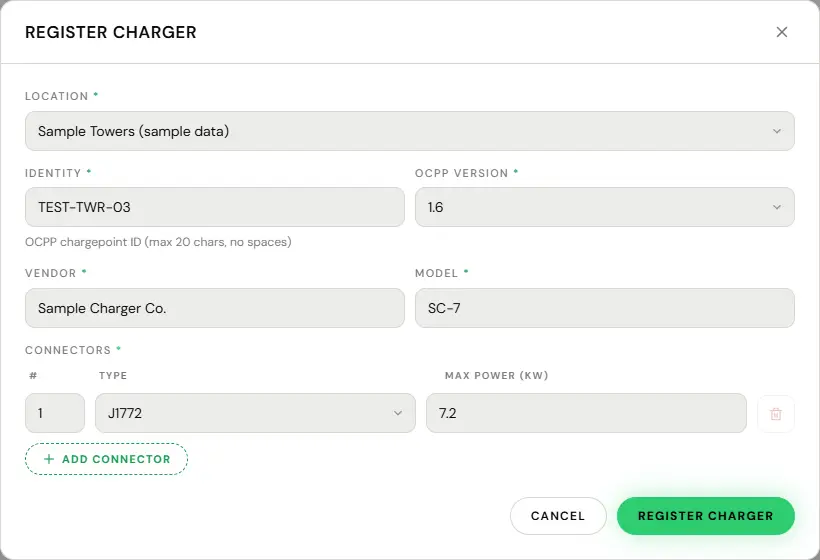
The charger identity is whatever the hardware announces. If it is typed twice and the two do not match, the charger is refused at the socket and becomes permanently unreachable, with no error message anywhere. It will simply never appear. Copy and paste it from the unit’s own configuration, every time, and if a charger never shows up this is the first thing to check.
Day three: money
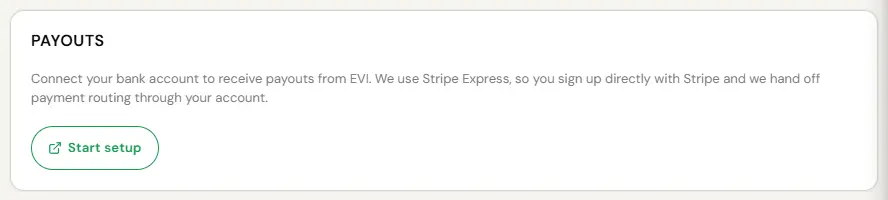
- Go to System, Settings and use Start setup on the Payouts card.
- Stripe asks for the legal entity, an address, identity verification and a bank account.
- Finish it. Until it is complete, earnings accrue but nothing can be paid out.
Revenue is not lost by delaying this. It accrues and is held, and it cannot move until Stripe has verified you. A building’s electricity reimbursement is the exception: its bank account must be connected within 60 days of launch. See Connecting your bank.
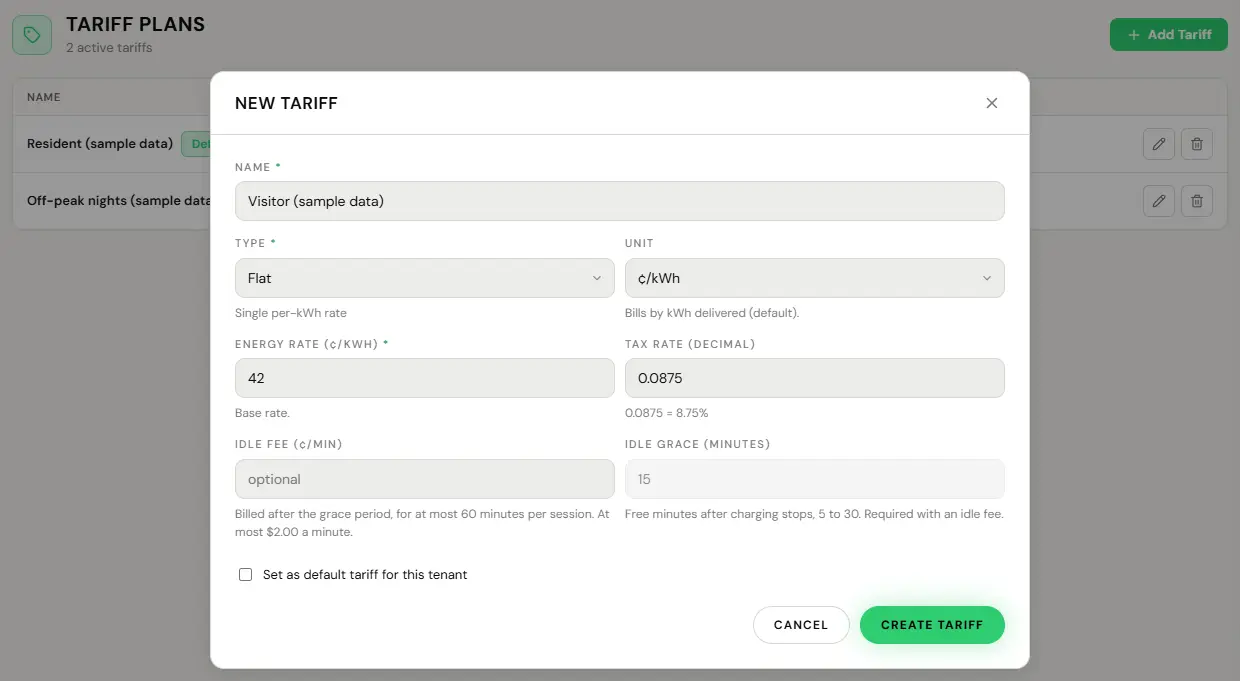
- Create the price under Manage, Tariffs with Add Tariff: Flat, Time of Use or Tiered, billed per kWh or per hour. A rate of 0 is free.
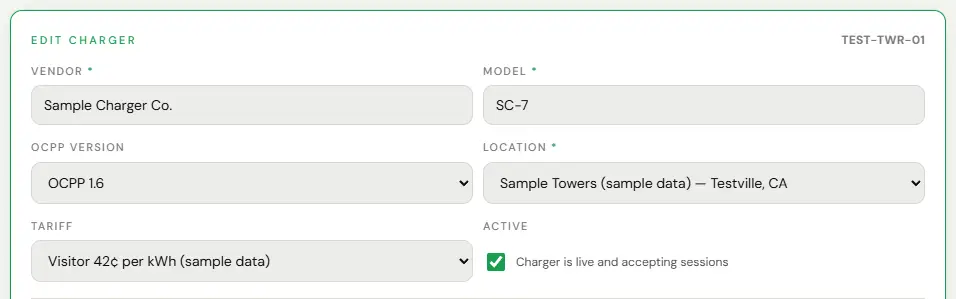
- Open the charger, use Edit, and pick it under Tariff. Or tick Set as default tariff for this tenant in the tariff form.
- Save. It is live immediately for every session that starts after it.
There is no session fee for you to set. EV Initiative’s connection fee is set per charger by EV Initiative and shown to the driver before they start.
Free is a real setting, not a workaround. A free charger still reports, still gets watched, still load-manages, and in Canada still generates carbon credits. See Pricing and money for the split and how payouts actually land.
Day four: the test
Do not skip this. One real session tells you more than every status light on the dashboard.
- Plug a car in yourself and start a session from the app.
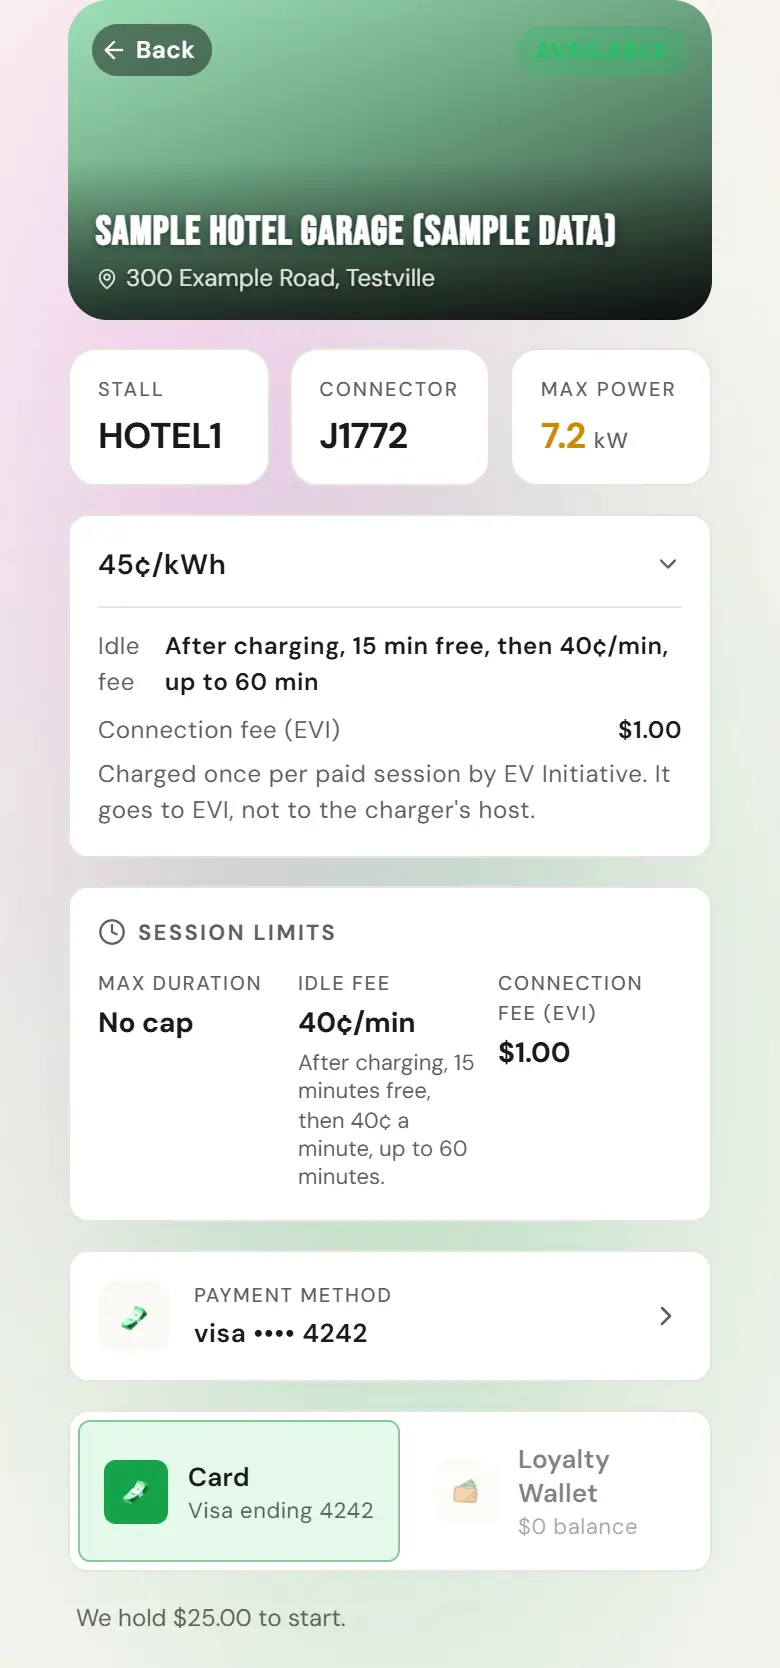
What a driver sees after opening the charger in the app, shown here at a different sample site: the stall, connector and power, the price and fees, the payment method and the hold. Sample screen with test data. - Watch it appear on Sessions, Active tab, with energy climbing.
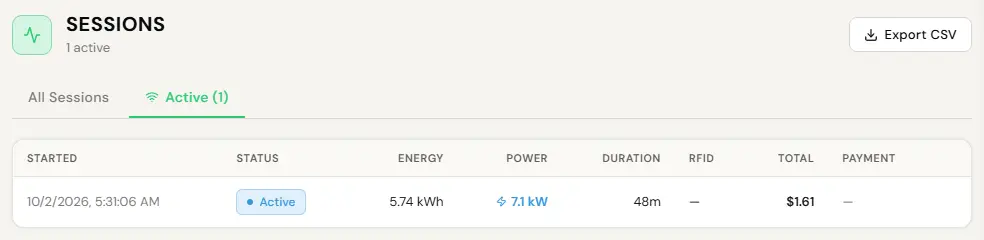
Sessions, Active tab: the running session’s energy so far, power, duration and running total. Click the row to open the session. Sample screen with test data. - Stop it. Check the session record shows the right energy and the right price, and that the split shows on Reports, Payouts.
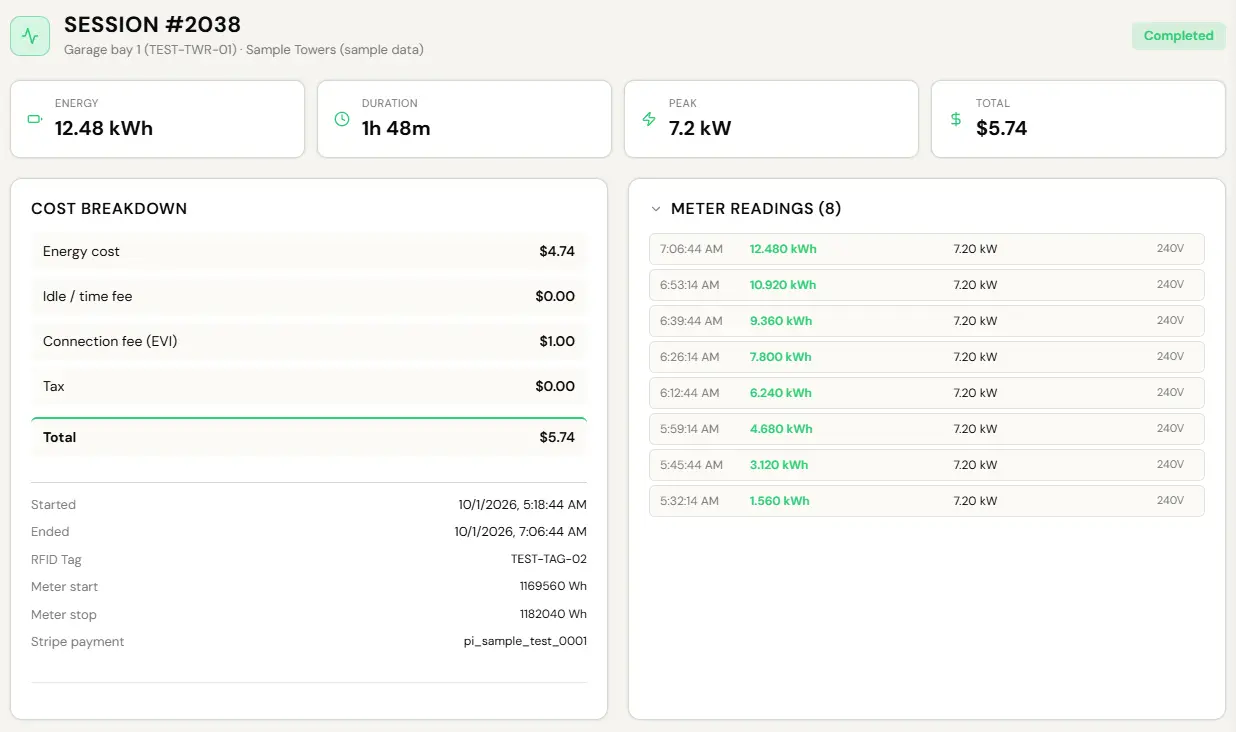
The session record: energy, duration, peak power and total, then the cost breakdown, the RFID tag and the Stripe payment reference, with the meter readings beside them. Sample screen with test data. - Check the hold on your card released.
Plug in first, then start. A certified charger deauthorises within about two minutes if nothing is connected, and that limit is set by weights-and-measures law rather than by us. It is the single biggest cause of failed charges on the whole network, and drivers who plug in first never see it.
Then hand it over
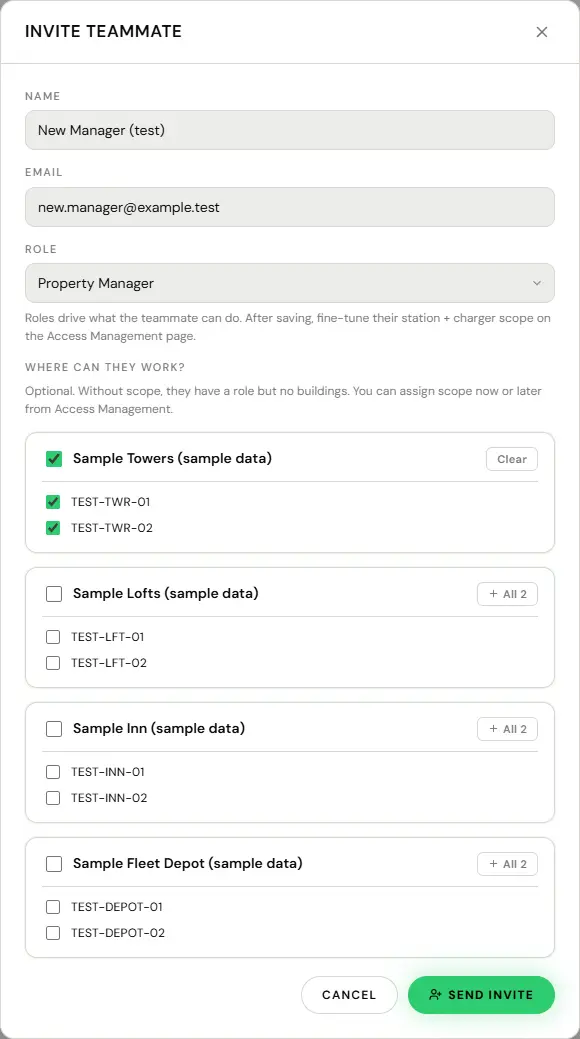
- Go to Team and invite each person.
- Give them the narrowest role that lets them do their job.
- Scope them to their own building or region.
You cannot grant anything above your own level, so there is no way to accidentally create someone more powerful than you.
After that, the useful next read is the fault playbook, because it is the page that stops you calling us.